For years I have tried to shun everything Martha Stewart because, well, I'm not sure why.
As much as I hated her back in the day I still felt compelled to go home and watch her tv show over my lunch hour. Keep in mind this was 11+ years ago. I think she annoyed me with her tag line "it's a good thing". Plus she always seemed so stuck up.
That being said, I must confess that her scrapbooking products rock my world.
1. I love her scoring board. Not only does it help with making envelopes in various sizes but it also comes with a guide to make cute boxes and other cute crafts.
2. I love her border punches. They are heavy duty and you can almost always find a coupon in the scrapbook mags.
3. I love her flower stickers. They are awesome and beautiful.
4. I love her circle cutter. One of these days I will buy one.
5. I love her craft paint. It hasn't hit the shelves yet but I've seen samples and it looks awesome. I can't wait to get my little hands on it.
I suppose this is my apology to Martha....11 years in the making.

My Life In Pictures The story of my life and family one frame at a time...
Thursday, August 25, 2011
Tuesday, August 23, 2011
More blocks
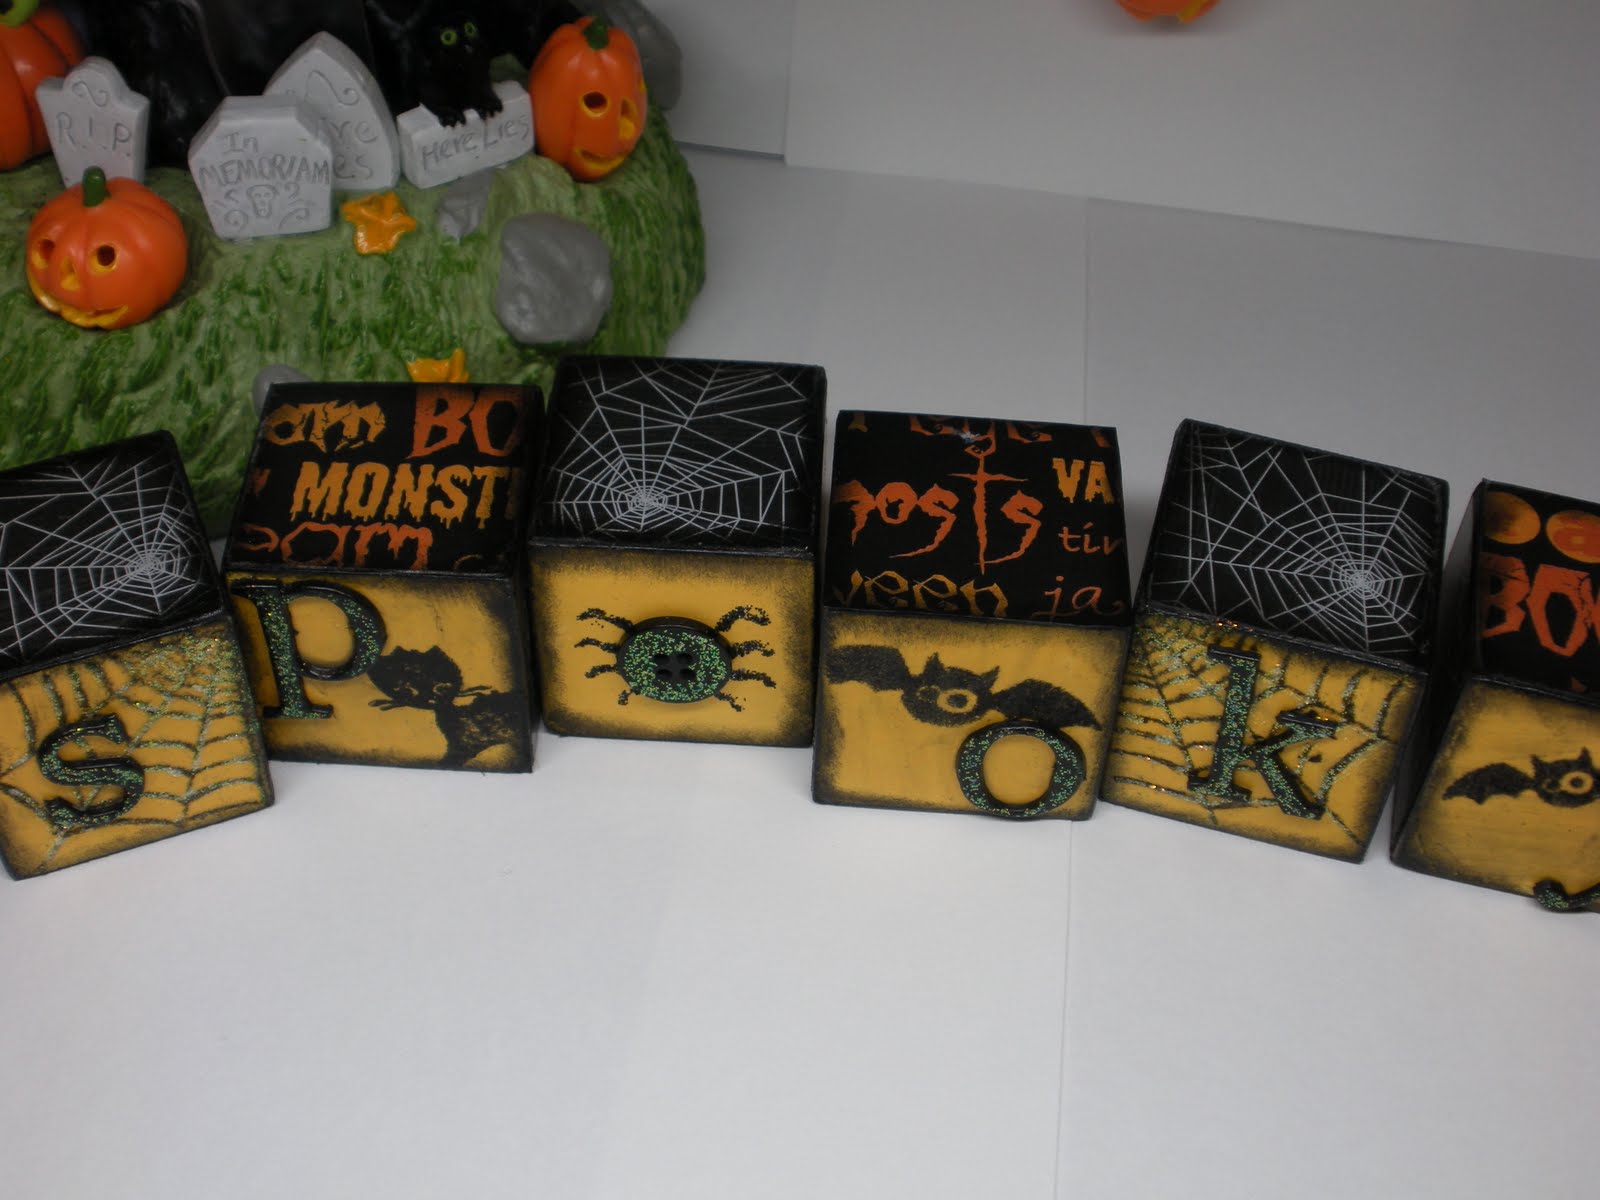
Little buddy has been running a fever again which means we stayed home today. He slept forever so I finished up another set of halloween blocks that I've been working on.


Tutorial:
1. Paint blocks with black acrylic paint
2. Cut paper to size (1.5 x 1.5 inches)
3. Adhere paper to wood blocks using mod podge
4. Stamp with spider webs, bats, cat
5. Go over spider webs with diamond stickles
6. Paint grunge letters with black acrylic paint and cover with diamond stickles
7. Adhere letters with glossy accents
8. Ink the edges with black chalk ink
9. Cover the blocks again with a final coat of mod podge.
Like them? They are for sale in my etsy shop.
Sunday, August 21, 2011
The weekend in review
We went to the campground on Saturday for a little getaway. The day was filled with golf cart rides, walks, swimming in the pond, and the slip-n-slide.
Oh, how I hate the slip-n-slide today. We angled it downhill and it looked like so much fun me and E decided to join in on the fun. I just jumped in, clothes and all. There were a few injuries: little buddy was stung by a bee and E hurt his leg. I am suffering from major sore muscles today. MAJOR SORENESS. I guess that's what I get for acting like a little kid but it was SO. MUCH. FUN!
Today we took a trip to Dickson Mounds. CB (aka the huz) and I haven't been there forever. I took a field trip when I was a kid and they used to have an uncovered Native American burial site that you could look at. Very creepy. Anyway, the museum was sued and you can't go in there anymore. You can learn more about the museum here. CB likes to go there because we figured he's 1/8 Cherokee Indian.
We came home and took naps (well at least I did) and finally got up and around. I cut up a delicious watermelon that we bought from a house down the road from us that sells produce he grows.
It was a good weekend but I'm exhausted. The plan for next weekend is to not leave my house. I have a ton of tomatoes that need to be picked so it will probably turn into "adventures in canning" next weekend.
Pics of the weekend will come tomorrow.
Saturday, August 20, 2011
We're sorry...
...the number you're trying to reach has been disconnected.
Heading out to the campground today to spend some time with the fam. It'll be nice to get away for the day and not have the everyday worries of chores and homework.
Have a great weekend!
Heading out to the campground today to spend some time with the fam. It'll be nice to get away for the day and not have the everyday worries of chores and homework.
Have a great weekend!
Wednesday, August 17, 2011
Public Service Announcement
A few years ago there was a website called how stuff works.com. It has some cool, cool stuff and explains things in simple terms. Anywho, a few of the writers banded together and started a podcast called Stuff You Should Know. I highly recommend it. Look them up on iTunes and give them a try.
One of their podcast topics dealt with microlending and a group called kiva.org. Here is how kiva works in a nutshell. Individuals in other, mostly poor, countries apply for small loans to better their lives in hopes to pull them out of poverty. Kiva users can make loans in $25 increments to help fund these loans. Usually the loans are only a few hundred dollars and the reason they go through kiva is because they either don't have access to or simply don't qualify for a loan. These loans are repaid and in the end you get back your initial $25 investment and hopefully help someone else in need in the process.
Please visit kiva here to learn more about the organization and microlending.
I decided back in February to join kiva and I made a loan of $25 to a woman in Kenya who wanted to buy some land to expand her chicken farm. I believe the total amount she needed was $350. It felt good to help someone better their life with just a little help.
I am fortunate to have a good job, a home to live in, and food on my table every night. $25 isn't a lot to give and you eventually get it back. You can withdraw your money at any time or you can choose to reloan it to another person in need.
I actually made my second loan today. It felt really good. So, I am paying it forward and am telling my friends about microlending and kiva.
***I am in no way paid or otherwise compensated by kiva.org, howstuffworks.com, or stuff you should know podcast***
Should you decide to join kiva consider joining the stuff you should know team. They are a bunch of cool people.
Monday, August 15, 2011
Behind the scenes
For some reason I have an obsessive urge to check my blog stats daily. Ok, who am I kidding? I probably check it at least once in the morning and once in the evening. I just have an obsessive nature. Don't even get me started on how often I check my etsy shop stats...but that's a different story.
Ahem. Ok, back on topic. I think maybe I do it as validation that someone out there is reading my little ole' blog. There is no real reason why I do it other than I'm getting a little fed up with facebook. Sometimes I just can't be restrained by 120 characters or less. Perhaps that's why I never did the twitter.
I suppose the other reason I blog is to let off some creative steam. You see, I'm a crafter. I know some (ok, maybe one) of my readers are as well. When I start getting that claustrophobic feeling I find something to make. Just process of creating something, anything, is very relaxing and cathartic. I don't know why I feel the urge to tell you all about it but I do.
I've dabbled in almost any craft imaginable. It started out with cross stitching which I loved but haven't done in years. I tried knitting but never took to it. I've made my own candles but that just makes a big mess and probably costs lots more in the long run. As far as paper crafts go I scrap (of course), make cards, and other "altered" projects.
Wait. What was this post supposed to be about?
Anyway, according to my stats I have readers in:
1. United States
2. Germany
3. Canada
4. United Kingdom
5. Singapore
6. India
I'm not sure who they are (well, I think I know who my Indian reader is...Hi G!) or how they found me but I'm happy to have readers.
I have some plans for the next few months. I've been jotting down lots of ideas in little idea book. Once the cooler weather sets in I should have more time to craft. It's been so nice outside that we've been spending time with our little buddy playing on the "boat" which is code for his clubhouse. The garden is really starting to produce so I have to keep up with the tomatoes. Homework is starting up too but I hope to keep a handle on it. It also helps that I'll have night class once a week and will have no excuse not to get some homework done.
Sunday, August 14, 2011
End of summer fun
It was such a nice day out today.
We played outside. Little buddy has such an active imagination. He calls his playhouse a boat. We sailed the seas in search of dinosaurs and dragons. Huz was in the "back" which meant he was on the other side with the dog. Walkie talkies kept us in constant communication.
There was a nice breeze blowing so we decided to get out the kite. Huz removed the kite string it came with and hooked it up to a huge spool of string he had lying around. I'm sure if we had more string the kite would have gone higher.


Then the camera battery died. After kite fun was over we went back to the boat. We spotted the ground squirrels wreaking havoc on my garden so Huz decided it was a perfect time for some target practice. Needless to say, the ground squirrel is no longer with us. I used to be sad about it but they dig holes all over my garden and eat everything so they simply must go. But I do admit that they are cute. If they'd leave my stuff alone they would be more than welcome to stay and hang out.
I'm sad that my weekend is over. Back to the daily grind tomorrow. :(
...and more tomatoes
Tonight we made a recipe that was in an issue of Taste of Home last summer.
It. Is. Awesome. Basically they are fried tomato sandwiches with cream cheese filling.

1. slice tomatoes
2. make cream cheese filling: cream cheese, salt, basil, parsley, garlic

3. put a dollop of the mixture on a tomato and put another slice on top.
4. roll in flour, egg, and bread crumbs
 5. fry in oil (so healthy!)
6. find someone to help you clean up

7. enjoy the yummy goodness

It. Is. Awesome. Basically they are fried tomato sandwiches with cream cheese filling.

1. slice tomatoes
2. make cream cheese filling: cream cheese, salt, basil, parsley, garlic

3. put a dollop of the mixture on a tomato and put another slice on top.
4. roll in flour, egg, and bread crumbs

6. find someone to help you clean up

7. enjoy the yummy goodness

Gee, I wish I had some tomatoes....

I attempted to make tomato paste this weekend. The jury is still out on how it turned out. I'm still on the fence about it. I started out with peeling, coring, and cutting almost 5 dozen tomatoes. My fingers did make the journey unscathed.
Basically it was pretty easy. They simmered for about an hour. Then I used my lovely immersion blender and made them into puree.

Then I let them cook down some more. Then I put it in the crock pot with a few cups of red sweet peppers, a few garlic cloves, and a few bay leaves.
This is what the concoction looked like today after cooking forever.

I'm not going to bother canning this but just threw them in some freezer baggies instead.
Bummer
I have lots of pictures to upload from this weekend and for some reason blogger won't let me open them. So...I guess you'll just have to wait a little longer to see what we did this weekend.
Saturday, August 13, 2011
Haunted House Tutorial
1. Cover the entire house in a base color, preferably something that will match the paper.
2. Paint the roof black.
3. Add Black Soot Stickles to give the roof a shimmery shingles look.
4. Measure and cut pages from an old medical dictionary to fit on the inside walls. Apply a thin layer of mod podge and adhere the pages. Cut out the spaces for the windows/door. Do not remove the paper around the door area. Simply cut on 3 sides and paint it to make it look like a door or your house will be door-less. I added an orange pompom as a door handle.
5. Measure and trim paper for the outer shell of the house. Apply a thin layer of mod podge and adhere the pages. NOTE: It is VERY important to continuously smooth down the paper or else it will get air bubbles. Cut out the spaces for the windows/door.
6. Take some old sticker or other plastic packaging and cut out pieces big enough to cover the entire area over the doors and windows. DO NOT use a paper punch. (I learned that this jams up the punch the hard way). Attach the plastic over the windows/door on the inside. They can be distressed to make them look like old creepy windows. Glue the "door" down to the plastic.
7. Using the same method in step 5 to paper the upper portion of walls on the lid. This can be very tricky and you may need a little trial and error in order to get the right sizes. It doesn't have to be perfect...just close enough.
8. Apply fringe or ribbon around the "eaves" of the house to cover up any gaps from step 7.
Details:
These are just a few details I added to my house but you can embellish any way you like or just leave it as is.
1, Apply die cut ghost to the inside of a window using a pop dot.
2. Ink a piece of gauze and cut into strips to make it look like a set of curtains. Attach on the inside.
3. Attach a die cut of a cauldron using pop dots. Spray a piece of cotton with glimmer mist and attach to the cauldron to make it look like it is smoking/bubbling.
4. Add a die cut broom.
5. Poke a hole in the chimney. Take a piece of beading wire and attach die cut bats. Cut a small piece of cotton and attach all to the chimney.
6. Poke holes around the perimeter of the "yard". Attach pieces of die cut fencing to toothpicks and insert them into the holes. Spray cotton balls with glimmer mist and glue to the outside "yard" to make it look like either grass or creepy mist.
Thursday, August 11, 2011
Odds and Ends
Just wanted to check in with a few quick notes:
1. I still need to write up a tutorial for the haunted house. I'm also going to take some "night" pictures of the house now that I bought a flickering LED tea light to put inside it. Super cool.
2. My garden tomatos are finally turning red so I'm more than certain that I'll be canning some sort of sauce or salsa this weekend. Pictures will follow (of course!).
3. I moved around some of the icons on the site. I moved the subscription options to the top so if you'd like to subscribe to the blog just type in your email address or add to your RSS reader. You'll get an email each time I add a post. If you want to subscribe and are having problems just let me know and I'll be happy to do it for you (and tell your friends!)
4. My next 6-week class starts this week so if I'm MIA for a little bit it just means that I have tons o'homework and no time to either craft or blog.
Now I need to track down a certain little person and get him to bed.
Wednesday, August 10, 2011
How cute are these?

I love Halloween.
I love stamps.
I really love Halloween stamps.
I really, really love that these were in the dollar bin at Michael's.
As if I need another hobby...
...for some reason I want to learn how to sew. Originally I wanted to learn because I can never find any curtains I like. I imagine that can't be that difficult to make. Then I started visiting sewing blogs (oh, don't get me started on the blogs!). There are so many fun projects that I can do!
Come to find out my grandma just happens to have a spare sewing machine. Now I just need to figure out how to use it.
I should probably warn my family and friends now that Christmas gifts will most likely be some sort of project I whip together because I have nothing better to do with my time.
Oh, wait. School starts up soon. Full-time. Where, oh where!, will I find time to craft?
On a completely different note, I started on more Halloween wood blocks last night. Stay tuned....
Monday, August 8, 2011
It's been a good day
I have one of the bestest friends ever. We've known each other since we were in 5th grade...otherwise known as a very long time ago. We live about 3 hours apart but always email whether it be something completely stupid or about our obsessions with everything mod podge-d and generally crafty.
Anyway, unbeknownst to me she pinned my boo blocks that I was selling on her pinterest board. Within 2 days I had over 40 hits and they sold. SOLD! So, I owe my first etsy sell to Tiki Laru. And to thank her I will make her anything she wants. :) I also know that she's already in bed and won't read this until tomorrow morning so I'm sure I will wake up with an email letting me know what she wants me to make her.
Anyway, unbeknownst to me she pinned my boo blocks that I was selling on her pinterest board. Within 2 days I had over 40 hits and they sold. SOLD! So, I owe my first etsy sell to Tiki Laru. And to thank her I will make her anything she wants. :) I also know that she's already in bed and won't read this until tomorrow morning so I'm sure I will wake up with an email letting me know what she wants me to make her.
Sunday, August 7, 2011
Project: Haunted House...is finished!!!
I am so excited to post these pictures. This house went way past any expectations I had.


I'll write out instructions tomorrow. It's late...I'm tired...and I'm going to bed!


Hello, I see you!


I'll write out instructions tomorrow. It's late...I'm tired...and I'm going to bed!
Lazy Sunday
I know that I should be outside especially since we've been cooped up in the house since Thursday with a nasty ear infection. But the truth is that I hate the heat and hate being outside in the heat. So, we're just going to hang inside and get some stuff done and maybe go outside later this afternoon.
No big plans except some cleaning and I'm going to try and freeze some basil this afternoon. I'm sure I'll take pictures and put up a tutorial (lol).
Little Buddy is feeling much better and is a real trooper when it comes to taking his meds.
No big plans except some cleaning and I'm going to try and freeze some basil this afternoon. I'm sure I'll take pictures and put up a tutorial (lol).
Little Buddy is feeling much better and is a real trooper when it comes to taking his meds.
Boo! to you


I heart Halloween. It is probably my favorite holiday (with Christmas following in a close second). Anyway, I've seen various versions of these blocks over the years at Spoon River Drive and thought I'd make my own. Of course I also listed these at my etsy shop.
Quick tutorial...and sorry no pics. It's hard to take a picture one-handed while working on this stuff.
1. Paint wood blocks with black paint.
2. Cut paper squares to fit each block. These are 1 1/2 inches so my creative memories square punch cuts the perfect size.
3. Attach paper using a thin layer of mod podge.
4. Trim any paper that is hanging over the edge and gently sand.
5. The letters are tricky. I cut out the letters using my Slice and Spook Alley design card. Then I traced the letters on the blocks in pencil. I used a black paint pen to fill it in.
6. Ink the sanded edges with black chalk ink. This gives it a "spookier" feel.
7. Add another thin layer of mod podge and let dry.
These are very quick and very easy to make. You could also use painted chipboard or stickers instead of hand-painting the letters. It would probably be easier and I should do that to weed through my letter sticker stash but I never think about it until I'm finished.
Friday, August 5, 2011
Project: Haunted House
Ok, so it may not be so much as haunted house as a Halloween house decoration.
I covered the outside with paper and cut out the doors and windows. The top section was a little tricky so I used some fringe so you can't see it too much. I covered all of the window and door openings with clear plastic packaging so it can also be used to store Halloween candy.


I cut strips of matching orange coredinations paper and distressed them by balling them up repeatedly then gently sanding the ridges. I need to figure out what I'm doing with the "yard" section but I have a few ideas. I have a few plans for minor decorations on the inside windows and the chimney but I'm not going to spoil it yet...you'll just have to wait and see :)
Thursday, August 4, 2011
The Process
I don't know how many times I have started a project on for it to 1) fail miserably, 2) turn out only so-so, or 3) turn out not even close to my original vision and even better than expected.
For example, the letters I decorated for my niece came out entirely different than I had in my mind. I was going to a different pattern paper (but same family) on each letter and add just a few minor embellishments. After a lot of frustration I decided to just go with plain paper and see where my vast collections of stuff lead me.
I took some time to work on my haunted house again tonight. Once again I had an idea in my head and it lead to a completely different look. I wanted to go with dark purple walls or black coredinations paper with dark orange or purple core. Turns out my black cauldron paper stack was black with pastel core colors.
So, time to go back to my massive paper collection. I found some awesome paper that came in the first paper pack I ever bought probably 10 years ago. The paper looks great but now I have to figure out how to put the paper on the lid. Hmmm.....to be continued......
Wednesday, August 3, 2011
Project: Haunted House
The advantage of moving my scrapbook stuff downstairs is that I can squeeze in a little bit of crafting most any night (got to love bathtime!) I took the opportunity to work on my halloween house tonight.
Basically the only things I had done to it was coat it in paint, paint the roof black, and added black stickles to make the roof look like shimmery shingles.
Tonight I lined the inside of the house with pages from a medical dictionary. I put down a layer of mod podge, cut the paper to size, and adhered it to the inside walls. I used an exacto knife to cut out the windows. Then I took some sticker packaging (recycle everything!) and proceeded to jam up my paper punch. I cut out squares of plastic using scissors and attached them to the inside of the windows using Glossy Accents. Now it looks like the windows have glass.


Garden Woes
Our garden isn't going as well as planned this year. I'm sure the heat is playing a huge part in some of our failures. We picked the sweet corn and onions last weekend. Broccoli has been done for awhile now. So far our tomatoes are huge but none are red. The potatoes, green peppers, and eggplant are doing great. Fruit trees/bushes...eh, not so much. I had to pull my cucumbers. I think there was some cross pollination going on.


Eggplant

Green Beans

Green Peppers

Basil - smells SO good

Green Tomatoes

Red Potatoes

Tomato Plants
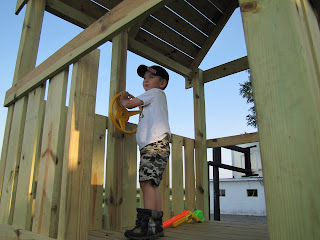
It's finished!
The playset is finally finished and a certain little boy is very happy. Now we want to try and turn the clubhouse into a pirate ship.


Subscribe to:
Posts (Atom)